Tuesday 30 December 2008

Chinese Crested

Chinese Crested

16" x 20" Watercolour

A head study of a Chinese Crested dog.

Actual size of dog's head is 8" x 8" - painting is sized to fit a mount and frame 16" x 20".

Visit my main website at www.azpaintings.com to commission a similar painting.

10% to TBAR True Blue Animal Rescue


SOLD

Wednesday 24 December 2008

Leader Of The Pack

Leader of the Pack

Oil on hardboard/masonite 7" x7" (approx)

A superb Gray Wolf, whose thick coat keeps him warm in the coldest of conditions, looks at home in the snow.

10% to Wild Spirit Wolf Sanctuary


SOLD

This painting is straight of the easel and will need several days to dry before shipping

Please visit my main website www.azpaintings.com for details of other paintings.

(with thanks to Tracy Brooks photographer on behalf of US Fish & Wildlife Service)

Monday 22 December 2008

Flash Gordon

Flash Gordon

Watercolour - 16" x 20" (internal measurement 14" x 10")

A portrait of a handsome Dobermann dog.


Anne
info@azpaintings.com

Tuesday 9 December 2008

It Came Upon A Midnight Clear

It Came Upon A Midnight Clear - 7" x 7 " Oil on hardboard/masonite.
On a cold winter night, a Dalmatian looks into the night sky at the brightly shining moon. What wishes would the Dalmatian make? Not for wealth, nor power nor beauty, but for love. If only we take the time to look, we can learn a lot from our dogs.
10% from the profits of this painting to Save The Dalmatians
If you don't wish to buy this painting, please consider making a donation direct to the charity. Thank you for helping dogs who are unable to ask for help themselves.

SOLD
This painting is straight off the easel and will need several days to dry

Please visit www.azpaintings.com for prints and cards

Monday 1 December 2008

All The Snow Lay Round About

All The Snow Lay Round About
7" x 7 " Oil on hardboard/masonite.
This painting is a 'prequel' to my fox painting 'Walking In A Winter Wonderland' and depicts the fox as a very young cub. Once the quarry of huntsmen on horseback with their hounds, foxhunting is now outlawed in the UK. Drag hunting has generally replaced foxhunting and the hounds follow a human runner who lays the scent with a cloth dipped in a specially prepared chemical. No killing involved!!
This fox lives wild in a garden (backyard) in Sussex in the UK.
(with thanks to photographer, Adam Stafford)
10% from the profits of this painting to Malibu Pet Companions
SOLD
If you don't wish to buy this painting, please consider making a donation direct to the charity. Thank you for helping animals who are unable to ask for help themselves.
This painting is straight off the easel and will need several days to dry before shipping


Please visit www.azpaintings.com/art.html for cards and prints

Wednesday 26 November 2008

Sleep In Heavenly Peace

Sleep In Heavenly Peace by Anne Zoutsos - oil on hardboard/masonite 8" x 7"
The title of this painting comes from the last line of the first verse of the Christmas carol - Silent Night and so finishes my 'trilogy' of paintings connected with that carol. The bed is very comfortable and the Dalmatian hopes to be able to sleep there (and did!)
10% from the profits of this painting to Save the Dalmatians
If you don't wish to buy this painting, please consider making a donation direct to the charity. Thank you for helping dogs who are unable to ask for help themselves.

SOLD
This painting is straight off the easel and will need several days to dry.

Visit my main website www.azpaintings.com/art.html for prints and cards

Sunday 23 November 2008

All Was Calm, All Was Bright


All Was Calm, All Was Bright - 7" x 7" oil on hardboard/masonite
The name of this painting comes from the second line of the Christmas carol - Silent Night. It seemed so appropriate to describe the demeanour and personality of this Dalmatian. Sweet dog.
10% from the profits of this painting to Save the Dalmatians
If you don't wish to buy this painting, please consider making a donation direct to the charity. Thank you for helping dogswho are unable to ask for help themselves.

SOLD

Sunday 16 November 2008

Do You Hear What I Hear?

Do You Hear What I Hear? - 7" x7" oil on hardboard/Masonite
A dog, once abandoned and unloved, now rescued and cherished. We know that dogs can hear things imperceptible to us - who knows just what they can hear?
10% from the profits of this painting to Old Dog Haven
If you don't wish to buy this painting, please consider making a donation direct to the charity. Thank you for helping dogs unable to ask for help themselves.

SOLD
Please visit my main website http://www.azpaintings.com/art.html for prints and greetings cards

***********************

It's been a while since I've written anything in my blog, mainly because of pressure of work - I've been painting so much that I developed a twitching thumb! I will make a point though, of getting back to my blog on a more regular basis.

I recently had an email forwarded to me for signature to protest against a barbaric cruelty being carried out on puppies. There was a video attached which I wouldn't dream of watching, but as I was scrolling down to the bottom of the email to add my signature I accidentally read a short account of what was happening and the reaction of the puppies before their death. I have been totally traumatised by what I read and it has caused me a great deal of distress. I have not told anyone what was in this email as I don't want them to suffer in the way that I have. I wonder what to do in the future when I receive emails such as this? Much as I am ashamed to admit this, but I think I am going to have to delete them without reading them. Of course this means that I am not adding my voice to try and stop these atrocities, but I don't think I am strong enough to cope with the awful pictures conjured up. For myself, I believe that the best I can do is to continue to create my art and donate a portion of the profits to animal charities. The email I talk about above, appalled me so much that I was virtually unable to do anything - which of course is no good for me or for the animals. What do you think?


Tuesday 28 October 2008

Silent Night

Silent Night

7" x 7" Oil on hardboard/Masonite

A Dalmatian looks out into the night sky on Christmas Eve and sees? Who can tell - maybe more than we can.

10% from the profis of this painting to Willing Hearts Dalmatian Rescue.


SOLD
Christmas cards of this image will be available during this coming week from my main website www.azpaintings.com


Sunday 26 October 2008

All I Want For Christmas Is You

All I Want For Christmas Is You

10" x 8" Oil on hardboard/masonite.

Here is my latest painting.

Who could resist this gorgeous Dalmatian puppy? The most wonderful Christmas present anyone could wish for. Don't forget though - a dog is for life not just for Christmas.


10% from the profits of the sale of this painting will go Save The Dalmatians

SOLD

Christmas cards of this image will be available during this coming week from my main website www.azpaintings.com

Sunday 19 October 2008

Party Day - Dog Island


Acrylic - size 16 " x 12"
Those who have seen my previous paintings of my imaginary island - Dog Island - will know that this is a magical place where dogs are not just tolerated but are very welcome, indeed people wishing to come to the island will need to be accompanied by a dog unless special arrangements are made!
Here three Dalmatians are the first to arrive - no doubt making sure they don't miss the picnic!
Come and join in the fun!

Anne

Sunday 12 October 2008

Dog Island

Dog Island
Watercolour - size 18½ " x 11½ "
Please bear in mind that once this painting is matted/mounted it will measure considerably more - in the region of 25½" x 18½" with the frame then being added to these dimensions.
____________________
Following the posting of my painting 'Warm Waters', it has now been arranged that several friends are going to join me on the island to share a bottle (bottles!) of wine while we watch our dogs play. As this island exists only in my imagination, the waters are shark-free, warm and safe; the climate is perfect with a warm sun and gentle breezes. The island has no traffic and so dogs are welcome and can run free to their hearts' content. This is a view of another beach on Dog Island. Come and join us!

Sunday 5 October 2008

Warm Waters


Watercolour - size 18½ " x 11½ "

Please bear in mind that once this painting is matted/mounted it will measure considerably more - in the region of 25½" x 18½" with the frame then being added to these dimensions.

____________________

This is another painting brought about by an art blog theme. This week's is 'water' and while 'a glass of' water' came to mind immediately, this image was soon overtaken by wonderful memories of a holiday in Florida mixed with the words 'water, water everywhere and not a drop to drink' which I have discovered is a misquote from The Rime of the Ancient Mariner by Samuel Taylor Coleridge - it should read 'Water, water, every where, Nor any drop to drink'. While this is not one of my favourite poems, Florida is definitely one of my favourite places - long days of sunshine and lazing on the beach (oh well, yes, theme parks too!)

__________


A watercolour painting of a beautiful beach lapped by a warm sea - crystal clear and inviting.

I look at this painting and am immediately transported back to a wonderful holiday where the days were filled with laughter and sunshine. I hope you will be able to join me at the beach when you look at the painting and feel the sand between your toes........

Monday 29 September 2008

Scarlet and Bold

10" x 8" Oil on hardboard/masonite

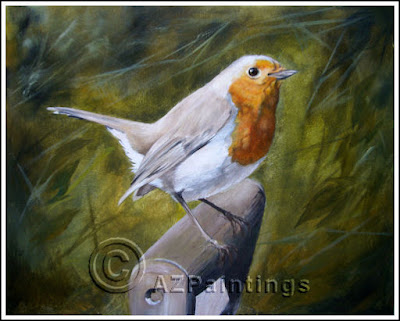
This painting was again inspired by an art blog whose theme this week is 'organic'. The word organic immediately brings to mind my allotment and garden which have both been gardened organically for many years. A frequent visitor while I am gardening is the little cheeky robin who with his scarlet breast and pretty song always brings cheer even on a dull day. He will come and sit very close at hand to watch for any tasty morsels which I unearth with my digging and is always a welcome friend. I was surprised to learn that it is only the British robin who is so tame - although I have never been lucky enough to have done so, it is sometimes possible to hand-feed robins as they are so used to human companionship. Not surprising then that this small bird is one of our favourite birds in the UK.

SOLD

10% from the profits of the sale of this painting will go to the Sarvey Wildlife Center

Please visit my main website www.azpaintings.com for purchase details

Wednesday 24 September 2008

Perfect Peace


Perfect Peace

10" x 8" Oil on hardboard/masonite


This is my latest painting which was inspired by the topic of 'Nature' on an art blog. The expression that nature was "red in tooth and claw" came to mind although I wasn't sure where the saying originated. On investigation I discovered that it was penned by Alfred Lord Tennyson, a poet I had read as a child and whose poems I love.


However, I decided to portray nature as I would like to see it rather than as it is, this time inspired by a rather more famous book - although I've discovered that it is actually a misquote from the Bible but it suited my needs. In my painting the lamb is snuggled up against the protective lion whose magnificent mane tumbles over the lamb's little back. The lamb looks out fearlessly knowing he is perfectly safe.

The colours in the actual painting are somewhat richer than shown here (I have a day later changed the photo which shows the colour a little more accurately)


10% from the profits of the sale of this painting will go to

Tbar True Blue Animal Rescue who have been so involved in helping the animal victims of Hurricane Ike.

SOLD

This painting is available direct from Anne at info@azpaintings.com or visit

www.azpaintings.com

(please allow for drying time as it is shown direct from the easel)

Tuesday 16 September 2008

Harvest Mouse

Harvest Mouse - Oil on panel 7" x 5"

These little creatures are the smallest rodents in the UK and according to the BBC website are the only Old World mammals with a truly prehensile tail - that is they can use their tail to grip. What interesting things you find out when you look!


(This painting is now sold)

Tuesday 9 September 2008

Colour/color prejudice in watercolours


Well back after a long break - not on holiday unfortunately!

Today I want to talk a little bit about colour prejudice in watercolour painting and, like colour prejudice in the human population, it concerns the colours black and white. However, here the similarity ends thank goodness!

Traditional watercolour purists would never use black or white in their paintings, asserting that black is a 'dead' colour and that white in a watercolour should only be achieved by leaving virgin areas of paper.

When I started painting in the long distant past, being a very law-abiding person, I used to follow this rule and it frequenly made my life very difficult indeed. How do you have white whiskers on a dog for instance if you don't paint them in? Well, when I didn't use white, I basically had two options. One was to simply scratch the paint away with a sharp blade but although I tried many, many times, I never became very proficient at this and instead of nice clean, sharp lines, I used to end up with somewhat 'bobbly' lines. The other technique is to cover the paper you wish to reserve with masking fluid. Masking fluid is a whitish liquid which dries to a rubbery consistency which you can then peel off from your paper. If you decide to have a try with masking fluid, use a pen and not a brush as I did at first - you will never get the dried fluid off your brush. If you want to cover a larger area and have to use a brush, use an old one as you will need to throw it away afterwards. Speaking personally though, like the scratching technique, I never enjoyed using masking fluid.

In my own work, I use watercolour paint in many layers. This in itself would be frowned upon by purists. The fact that I use black and white would just confirm their worst opinion!

However, I must make a couple of, I believe, very important points. Firstly I never mix white with any other colour. I have a real distaste for something which is actually quite widespread in watercolour paintings, and that is 'chalkiness'. I find that this chalkiness completely deadens the painting and removes the light and life from it. I mostly use white where it is the final colour i.e. whiskers or hairs overlapping a coloured part of an animal's coat or the lighest part of a white section. Occasionally I will use it as a 'basecoat' in a small part of the painting. By this I mean that I will paint a very small area white, wait for it to dry completely and then very carefully and lightly, apply a dryish thin coat of colour over the white, thus allowing the white to shine through. If I make a mistake and apply the colour a little too wet or not quite lightly enough and it starts to mix with the white below, I will immediately add more water to dissolve the paint and mop it up - I really, really do hate chalky paintings! Unfortunately this technique is very time-consuming which is why I believe so few artists use it.

As for black I usually use lamp black and add just a little of another colour to enrich it - perhaps a touch of French ultramarine or burnt sienna. I recently bought some mars black but am being very careful about how I use it and in fact will only use it for backgrounds as I like the way it granulates. I dislike it in the body of the painting however as it is a dead, flat colour and despite being black has that 'chalkiness' about it that I don't want in my paintings.

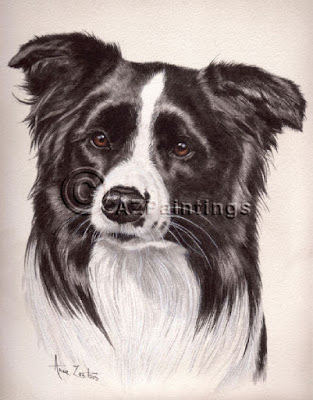
I've included a painting of a border collie today - a black and white dog. This painting contains very little white paint indeed - just the whiskers and where some of the white hairs overlap the black. All the shine in the coat is the paper shining through the paint. Although, as I say, I use many layers of paint, I am careful in certain areas, to make these layers very thin and transparent so that the finished painting will be lively and fresh. The black has been moderated with touches of blue and brown.

So although I am not colour prejudiced in my paintings and will use both black and white, I use them with care.

Wednesday 20 August 2008

Contratulations!


I thought it might be nice to occasionally include news of some of the dogs I have painted.
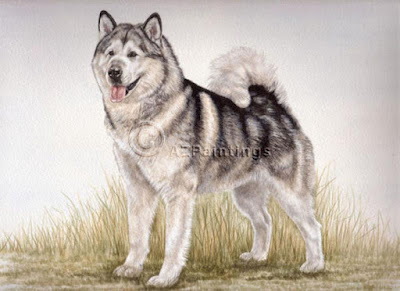
Today's news though isn't of a dog I have painted but he belongs to Sue Ellis for whom I painted the portrait above - her Ch Chayo Blue Thunder. Blue is the first Champion Malamute in the UK and of course I am very proud to have painted him and no doubt Sue is equally proud to have bred him and to own him.
The dog in the news today is Sue's Ch Chayo Dom Perignon ShCM who has won an unprecedented two Best In Show awards at general championship shows in the UK and is the first Alaskan Malamute to win a Best in Show at a general championship show. Sue obviously has a knack of breaking records with her dogs! Loius (Dom Perignon) is a son of Blue.

Wednesday 30 July 2008

Brushes On Watercolour - Wet On Wet


I had an interesting question the other day about watercolour paper and whether it is used wet or dry. Well, it is used both ways depending on what you are painting and the effect you want to make.

If you are going to paint a detailed painting, which needs to be accurate to scale (like mine) you will have to work on dry paper. The reason for this is that you will need to make your pencil drawing on your paper and as we all know - you can't draw with an ordinary lead pencil onto wet paper. A long time ago I did try drawing on my paper before soaking and stretching it. Unfortunately I discovered that when you do this, you also stretch your drawing and even when the paper has completely dried, the drawing is not absolutely as it was when you drew it. So for my purposes where accuracy is vital, it was useless. If however, 100% accuracy to scale is not needed, then you can certainly do this.

You may wonder why anyone would want to draw first, soak later. The reason for this, is that when you have a sheet of wet paper on your board (not completely, dripping wet but still soaked through) you can lay your paints onto the paper and get some wonderful effects. You will need to practice to see what I mean, but essentially the paint will mix in with the water held in the paper and spread out into wonderful shapes and patterns. When you then add another colour to the mix - oh lovely! Do be aware though, that where the paper is holding a lot of water, you will need to put reasonably strong colours on your brush.

If you need to let your paper dry so that you can put on an accurate drawing, you can however, wet areas of your paper with clean water (make sure it is clean!!) and then drop your colours into that area. No doubt you will find some frustrations. Quite often the paint will collect to the edges of its spread and when dry, creates and thickish hard line which most often you won't want. If you try and lift some of the paint when you see this happening, you will find to your dismay that quite often you get a 'floral' effect and most of the time you won't want this, although in a looser painting, it can be utilized to become a useful part of the design.

The picture at the top shows a small part from the background of one of my paintings (ignore the piece of dog neck) which shows granulation. Granulation occurs when some paints are mixed together - I usually make mine happen by adding ultramarine to my mix. I love the grainy effect it gives.

So to summarise - your paper can be worked dry, damp or wet. It will depend on your requirements and may well differ from painting to painting. Just keep going and don't give up if your efforts appear amateurish to begin with. Enjoy what you're doing. Don't make it an effort but look forward to it as an enjoyable discovery. Apart from learning to draw and paint, you will also begin to see differently. Yes, you will. Where once you would just look at an object, now you will start to really see it. You will notice it's shape, colour, the way the light falls on it. Yes, life will become more fun!

Talking of fun, did anyone notice the heading of this piece? If you take the initials it reads BOW-WOW - perfect for a dog obsessed person like me!

Wednesday 23 July 2008

Drawing - how much, how little? AND A Smiley Spot

A Smiley Spot

Back at last and I thought it would be interesting to reply to Sophie's comments on my last blog in detail.

She mentions using a softer pencil trying to achieve a darker drawing. Certainly a soft lead will enable a darker line to be made - a darker, softer line. The harder the pencil, the sharper and lighter the resulting marks will be. From my own experience, I would never try and draw with an 'h' pencil as I find them far too hard. Like Sophie, I also tend not to press very firmly when I draw and I don't get on with 'h' pencils. I have found the drawback with the soft 'b' leads is that they tend to be messy although it's possible to lay in some lovely shading effects with them. Since I draw - other than as a preliminary to a painting - very little now, I use my trusty 'hb' pencil. I find this just right, not too hard and not too soft. It is soft enough to be responsive and yet hard enough not to be messy. It is easy to erase and for my purposes, just perfect!

I would suggest that if you are keen on drawing, you should go to your local art shop and buy a box of pencils of varying hardnesses. Buy a nice sketch pad as well and then, as I am always saying, practice, practice, practice! Art is such an invididual thing that what one artists swears by, another cannot abide.

However, one thing I can say is that drawing in order to achieve a pencilled finished piece of artwork is very different to the drawing required as a guide for a painting. I hope you can see from the photo in my previous blog 'Talking About Drawing' (not a brilliant photo I'm afraid) that the drawing is really just an outline of the major points to help me when I start the painting. It is also drawn lightly as I don't really want it seen in the finished painting. You certainly don't want to be trying to paint over a mass of pencil lines; for a start your watercolour paint would just skim over the surface and not be absorbed.

So Sophie, and anyone else who is thinking about painting, when you make your preliminary drawing, don't try and put in too much detail - let your paints do this. If you do decide to use soft 'b' leads, be aware that they smudge very easily and will spoil the white surface of your watercolour paper.

As an aside, the 'h' and 'b' sizes given are the English sizes - I'm afraid I don't know if they are the same in the US or elsewhere.

The painting I have included today is one of a small number of my paintings which are now available as prints and greetings cards. This is the first time any of my paintings have ever been available other than as originals and I am planning a selection of Christmas cards which I will be making available shortly.

I think the oil painting above would make a perfect picture to hang in a bedroom with the smiley red face making waking a little easier! As I said, this is also available as a greetings card and although it doesn't have any message on the inside - as I thought this would make it more versatile - I think it would make a smashing 'get well card'.

Let me know what you think!

Thursday 10 July 2008

A New Experience - Oil Painting

A Comfortable Spot - 10" x 8" oil on canvas

SOLD

While I've been away, I've been the one who's been learning - I have painted my first few paintings in oil paints. It's a very strange experience using oils after having painted in watercolours for so many years. I say that I've been learning while I've been away, but to be honest, painting really is a skill which takes a lifetime to master and you never stop learning even if you paint virtually every day of the year as I do - good thing I love painting!

Anyway here is my very first oil painting, A Comfortable Spot - I hope you like it. When this painting is sold, 10% of the profits will be donated to Save the Dalmatians - one of my favourite charities.

Sunday 29 June 2008

Talking about drawing


Now that you have your paper and paints and have practised a bit, you will probably want to paint a picture and in all probability, you will want to make a drawing on your paper before you start - unless you are a very free-spirited painter! How do you erase any mistakes you make? - you don't!

One big problem with watercolour paper is that the surface is delicate. This means that if you start erasing your pencil marks, you will damage your paper and when you paint over the area, it will leave an unsightly mark where the paint reveals the scrubbed surface. You might try the kneadable putty eraser rather than the normal type of rubber (whoops, sorry I think that's rather rude for my US friends!) - I mean of course eraser. I can't get on with this type of eraser myself as I find it leaves a slightly greasy surface to the paper so just use a small, soft rubber eraser. Why not get a piece of pre-soaked paper (make sure to use a piece pre-soaked as it's surface is more delicate then and will give you an accurate result) and try varying degress of pencil pressure and then erase them (I keep having to change my wording to 'erase' with this piece!!) When you then paint over these areas you will see how much you can get away with. You will be all right with very light pencilling. However, after much trial and error, I now draw onto tracing paper instead and then just transfer this to the paper as I had too many sheets of paper wasted when I drew straight on to the paper. Now I can erase my pencil marks to my heart's content!
Watercolour painting entails a lot of control - even in apparently free-flowing pieces, so all the practising you do now will really pay dividends. You will have a lot more confidence when you feel even just a little bit in control of those beautiful watery colours. If you have practised you will already have made some discoveries - that watercolour dries lighter than when you apply it, for instance, unlike acrylics which dry darker. You will probably have found that when you start to mix more than two or three colours together you always end up with mud! One of the challenges of watercolour is to retain its vibrancy - particularly difficult in paintings like mine which are made up of many layers, as of course the natural tendency for the paint when overlaid with another layer of paint, is for the two lots to dissolve together and it is very easy when layering watercolour to end up with an opaque, muddy mess, but don't worry, with a little help, you will soon be producing paintings you are proud of.

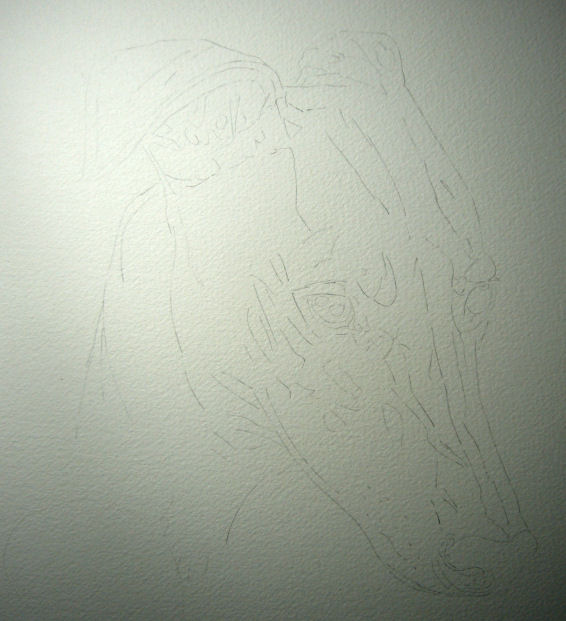
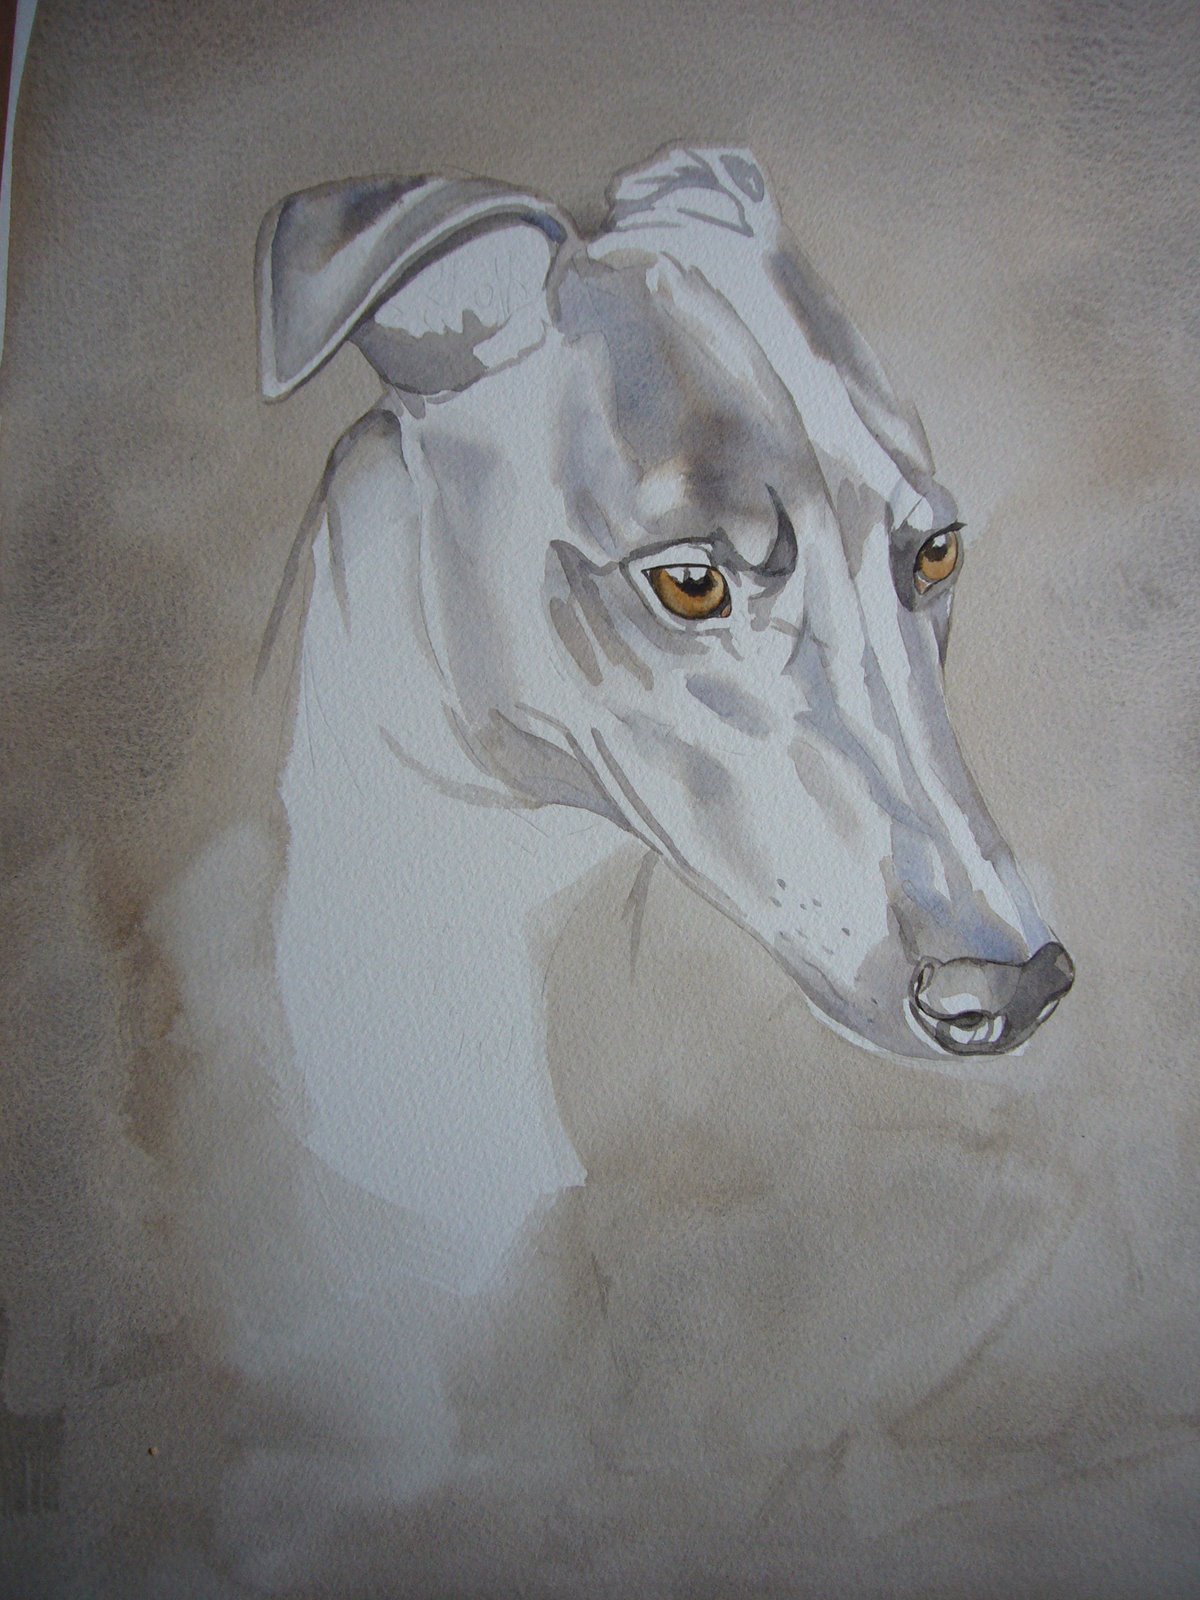
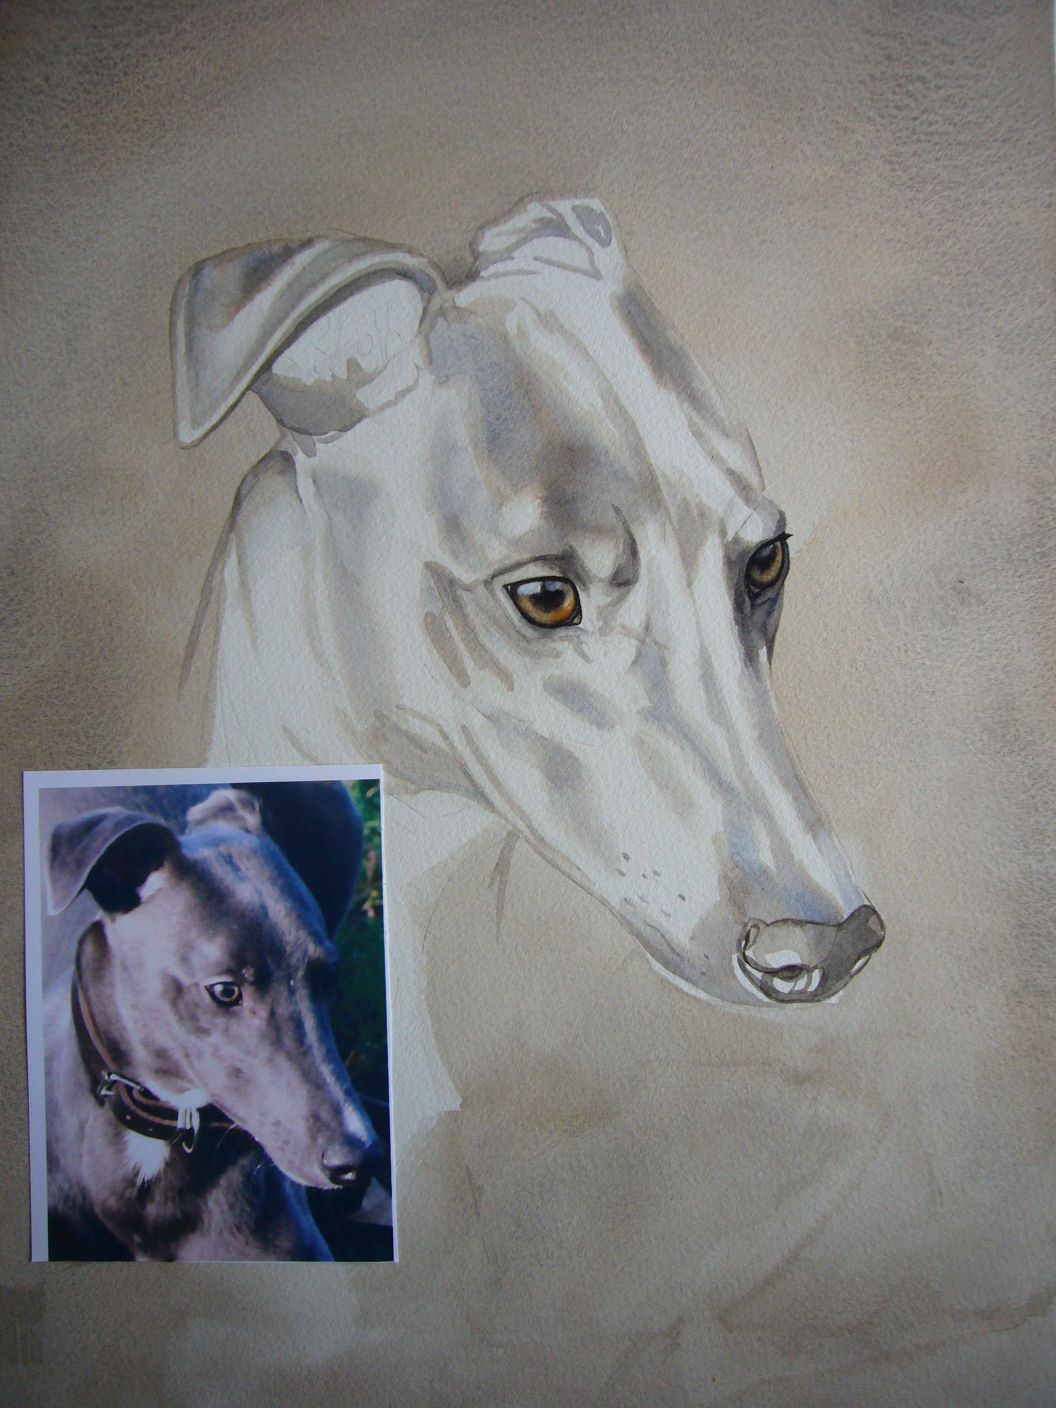
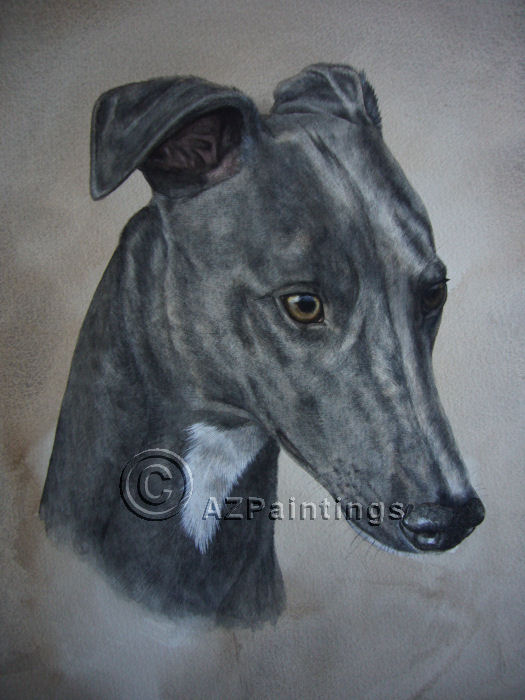
The pictures I am including today were originally intended to be for my website but I forgot to keep taking photos as I went along!! The 4 photos show a) the pencil drawing (I hope you will able to make this out), b) a few washes in c) more work on the eyes d) the finished article. For those who wondered, he is a lurcher - a really lovely friendly boy I had the pleasure to meet when his owners came to pick up the painting.

Monday 23 June 2008

Painting hints and tips - brushes


Before we talk about brushes I will just quickly mention gummed tape.

The tape I am talking about is what you will need to stick your wet watercolour paper to your board. Quite obviously ordinary sticky tape or masking tape won't do, as this would just peel away from the damp paper. You need the kind which needs to be wetted to make it sticky. I am mentioning this as someone told me that they weren't quite sure what tape I meant. I have found this site by googling it - http://www.artdiscount.co.uk/acatalog/Brown_Gummed_Paper_Tape.html and it does show what I mean. I haven't used this store personally as I buy mine from my framer.

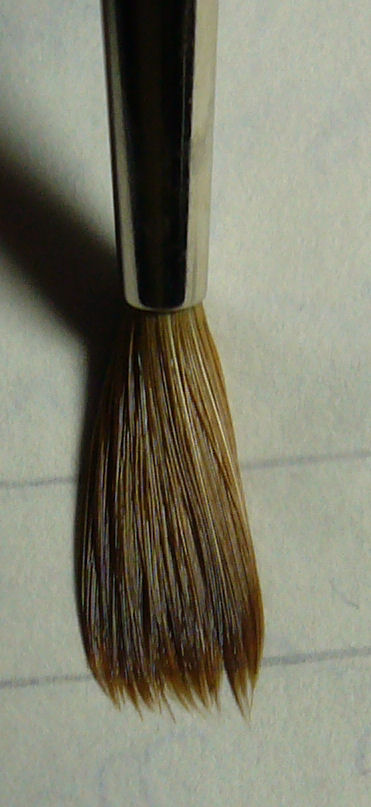
Okay, back to brushes. A very difficult subject for me to be able to make any recommendations to you. Artists vary widely in the sort of brushes which they like and use. For my own work, I mainly use a size 3 pure sable. I like two makes in particular - Rosemary & Co and Premier Brush (www.premierbrush.co.uk) - perhaps my favourite of these is the P33? Maybe and then maybe not - each brush varies quite a lot and I have to spend a long time in my local art shop trying them out to find out which one suits my needs. In any art shop worth its name you will find a small pot of water beside the brushes. This isn't for thirsty tiny people, but it is for you to try out the brushes in. When I buy my brushes, I am looking for several attributes. Firstly I need the brush to hold a reasonable amount of paint - bearing in mind that due to the small size, this is still a very small quantity. It must be springy and not flop when wet. When I say springy, I mean that when you press the brush against the paper and then lift it off, it springs back into shape. When my brush is wet, I like it to come to a fine point with no odd little hairs sticking out further than the rest. But now comes my own peculiar brush requirement! When I press the brush down against the back of my nail, I want the brush to fan out so that the bristles make a straight edge. The photo above shows what I mean. I use the brush like this to make the fine coat texture in my paintings. Unfortunately, due to the way I use these brushes, they only last for about one or two paintings before I need to use a new one as they become blunt and therefore the coat texture in my paintings would become coarse unless I changed the brush for a fresh one. I have only found sable to meet my needs with the exception of the brush I use for laying in the backgrounds which is a Daler Rowney Dalon D88 1". I also have a very old and worn half inch brush which I use for scrubbing out areas of colour (or should I say reducing areas of colour as you can never get back to the white paper once it is painted on). Of course if you looked in my paint box, you would find it full of all sort of brushes which I have collected over the years and which have been discarded but not completely, as you never know when I might need it!!

So, you have your paper on your board, you have your paints and now your brushes. All you need to start your painting is some clean water and a piece of kitchen roll to wipe your brush on, and you're off!

I really would suggest that you spend more of your time finding out what the paints do, rather than rushing in with painting a picture. I only say this as I don't want you to become discouraged. It is so easy to start full of enthusiasm and quickly come to the conclusion that you can't paint, when had you only taken things more slowly, you would have seen that after all you can paint! It isn't only being an 'artist' that makes you able to paint, it's much more about learning the skill of how the paints work which will enable you to produce paintings you will be proud of. Everyone can paint - we all just need confidence and practice. Also, don't worry about what you paint. Paint what intrigues and satisfies you. Don't worry if it isn't fashionable or if the cognoscenti would turn their noses up at it - if you like it, it's ART!!

Tuesday 17 June 2008

Paints


Did you enjoy your visit to the art shop? Have you had a go at sticking your paper to your board? Perhaps you've even attempted splashing some paint onto the paper - I hope so!
Talking about paints - which type should you get? Watercolour is available either in pans or tubes. I used to prefer the pans as I felt the paint was a little more 'pure' without the running agent which is in the tubes. However, as I gradually worked my way through the pans which came with my ready filled watercolour box, I started to replace the colours with tube paint. I squeeze a small amount into the empty(ish) pans as I need it and find I am happy with this. The brand I use is Winsor & Newton - for no other reason really than that my art shop has a large selection of their paints! I would suggest you buy the paints which are easily available to you - no point in making life harder than it is!

Winsor & Newton has an Artist range and a cheaper range called Cotman. Both of these are good quality paints and I know that there are some professional artists who are extremely happy with Cotman paints. I have a couple of tubes myself, but most of mine are the Artist range as I find the colours cleaner.
In traditional watercolour, white and black paint is not used. If you want white in a painting you have to reserve the space i.e. don't paint on it! or scratch it off with a blade. You can use masking fluid to help keep the paper clear of the paint - it's a rubbery fluid which dries where you paint it, and is rubbed off when the paint above is dry. When rubbed off, it leaves the untouched paper underneath. I have tried on several occasions to use masking fluid and in fact only threw away a dried up bottle the other day - which I think demonstrates quite clearly how I got on with it - or rather didn't! I struggled for several years not using white or black, not liking to break the watercolour 'rules'. Then one day, I just thought to myself that my sort of work was not the common application of watercolour paint with gorgeous washes and light brushwork. My paintings are built up of many layers - again a 'no no' in traditional circles, and I do now use both white and black! I must admit however, that white, in my experience, has to be used very carefully indeed if the painting is not to become chalky and dull. Despite the many layers of paint in my pictures, I still like to see the paper glow through and it can't glow through a thick layer of opaque white! What colours to buy? Well, this really does depend on the subjects you like to paint. My own most often used colours are Ultramarine Blue, Burnt Sienna, Raw Sienna, Raw Umber, Lamp Black, Mars Black (I love the way this granulates in background washes), Winsor lemon, Alizarin Crimson, and Cadmium Red. I have several other colours but the ones listed are the ones I tend to use most often.

Next time, we'll talk more about brushes and erasing pencil drawing on watercolour paper (don't!!)
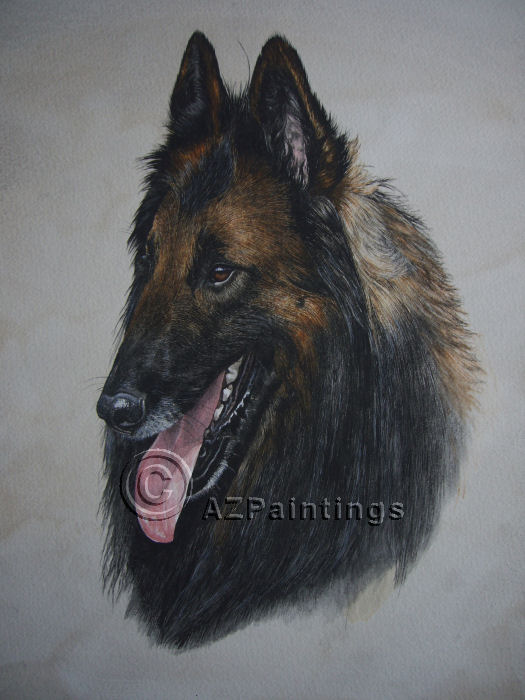
I remember at the beginning of this blog I said I would post a Tervueren I was painting - well, here it is finally!

Have fun painting!

Friday 13 June 2008

More watercolour hints and tips


Well, last time I said I would go into more detail about starting off with watercolour - or watercolor as my American friends would write - so lets get back to basics with the paper.

As I wrote before, I use Saunders Waterford 140 lb NOT as it is a nice middle of the road sort of paper. I would suggest that as a beginner to watercolour painting, you should find your local art shop and spend a nice hour browsing around just getting a feel of the place. Most art shops have very helpful staff who are often artists themselves and can be a mine of useful information. You will find that watercolour paper is sold both in pads and in large sheets. I recommend that you buy a few of the large sheets in different finishes, weights and makes. Not too many as otherwise you will become overwhelmed but enough for you to have fun trying them out. These large sheets measure 22" x 30" and I certainly wouldn't recommend you try and use a whole sheet straight away. With most of my paintings I use half a sheet, but I think to begin with, that a quarter sheet is a nice size to get acquainted with the paper's characteristics, and give you enough pieces to experiment with.

Now - soaking the paper. You may wonder why this is necessary. Well, you only have to think of a sheet of paper which gets wet - how it crinkles and dries anything but flat. By soaking the paper ourselves, and then sticking it to a board, we end up with a lovely flat surface. When you buy your watercolour paper you will need to buy a roll of sticky brown tape - the type you have to wet to get it to stick. I buy the 2" thick rolls and I get mine from the art shop as well, rather than a stationers, as it makes sense to buy the really large roll which they sell - you will use it quickly enough!

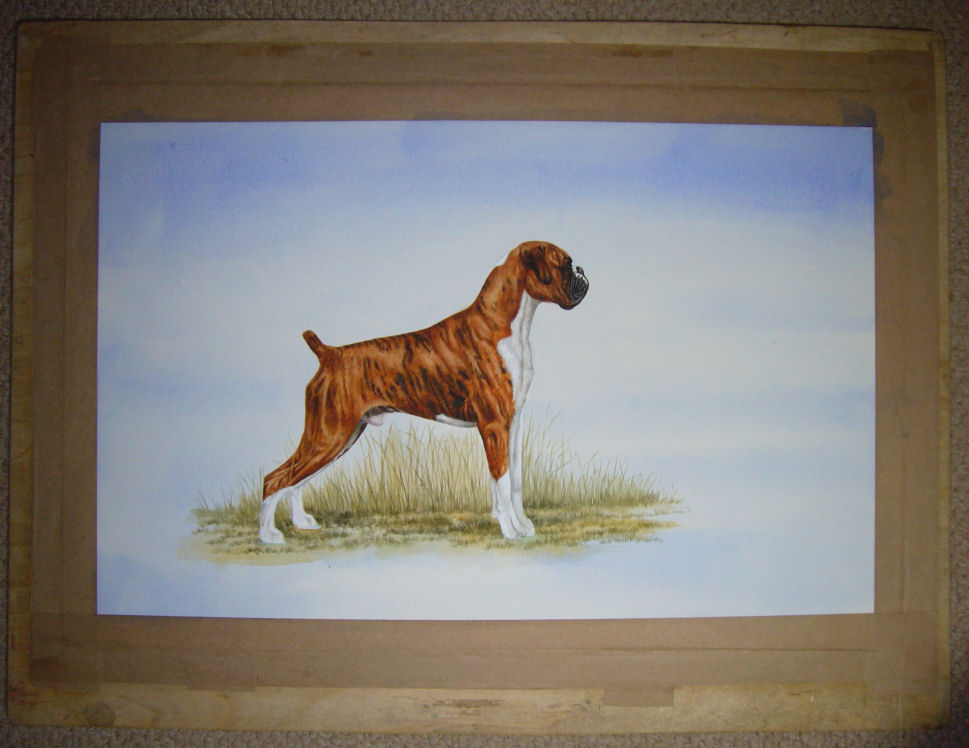
So, you get home with your paper - let them roll it up in the shop. Don't worry too much about it being damaged as you are going to stick it in the bath soon! Fold it in half and cut it and then either use that size or fold again and cut to use the quarters - which I would recommend. Don't put it in the bath yet though as now you need to make a board on which to stick your paper. My board is made of plywood - a quarter of an inch thick and measuring 19" x 25" (I have a larger one as well). The photo above shows it as it is right now - with a nearly finished Boxer on it. Make sure that the surface is completely smooth - including the edges as you don't want your first dabble in watercolour to end with splinters! It is even more important though that the surface has no lumps or bumps on it at all, however small, as when your paper dries on your board, these small bumps will show right through and ruin the painting - I speak from experience!

To recap, you have your paper, cut and ready, you have your roll of sticky tape and your lovely new board. To action! It's probably easiest to cut the sticky tape (not sticky until you wet it otherwise it won't work) while your paper is dry. Cut it the length of the four sides and overlapping each end about an inch or so. Take your chosen piece of paper and put it in a bath of cold water - as little as possible remembering to be eco-friendly! - but covering the paper completely. At this point I usually go away, get on with something else and completely forget it for absolutely ages! I wouldn't suggest you follow my example but probably wait about 5 minutes or so, but don't worry if you're as forgetful as I am!

Take your piece of paper out of the bath and drip off the excess water, then take it to your board and lay it down in position. Get a piece of kitchen roll and lay it flat over your paper and gently mop up the excess water - don't take ages over this, it's just a quick dab. Then I very quickly run the damp kitchen roll over the edges of the paper to take up just a little more water at the edges. Now get a sponge - not a huge one but a small kitchen sponge size - wet it, and run it along the length of one of your pieces of tape but only wet half the tape - so you go along the full length but half of the full length is dry and half wet - do however wet each end (where it will overlap onto the board) completely. This means that you can stick the wetted half of the tape to your board and the dry half to your damp paper. You will then need to spend half a minute or so, running the back of your fingernail along the dry side of the tape to get it to absorb the water from the paper. Repeat this for all four sides. By doing this instead of wetting the whole of the tape, you avoid the common problem of paper not sticking to the tape properly. If this does happen, you really just have to take the paper off the board again, as when it dries, it shrinks and becomes tight like a drum and unless stuck firmly to the tape, will pull away from it and dry in a most peculiar fashion! Don't be scared to try - the worst that can happen is that you have to throw the paper away (recycle of course) and start again.

Once your paper is firmly stuck to your board, put it aside to dry. You can hasten the process with a hairdryer but I've had more problems with the paper pulling away from the tape when I've done this, so generally try and avoid it. Of course, if you want, you can get your paints and find out what it's like to put 'wet in wet' ie watery paint onto wet paper. I can tell you - it spreads! One of the challenges with watercolour is that it can be difficult to control. Wet in wet washes are an instance where you really don't have a huge say in what happens with the paint - well that's perhaps an exaggeration but makes the point. On the other hand, some wonderful accidents can happen this way and a lot of artists use the results as a starting point for inspiration. Depending on which mixture of colours you use, you can get granulation which I really like. However, that is for another day and I shall leave you now with your lovely watercolour paper and I suggest that to begin with you just 'mess around' with your paints to see what happens with a fully loaded brush, an almost dry brush, working on dry paper, wetting the paper (with clear water) and then puddling paint into it. Some things you can only learn by hands on experience so you mustn't think that you are wasting your time, or that because the result looks a mess, that you can't paint. This is a valuable learning experience and your first step in learning about how watercolours work. Everyone can paint - but some people need to rid themselves of their preconceived notions that they can't - so go on - enjoy! Let me know how you get on - I'll be really interested.

Wednesday 4 June 2008

Poppy and Watercolour hints

This is my latest to be listed. I love poppies and this was one growing in my garden. I thought it was too pretty not to paint and so I have - in acrylics! It would be quite interesting to paint it again but in watercolour to see how the different styles look. Maybe I will at some time.

I said I would start to give some tips on watercolour painting, so I will give my first today and that is to buy quality equipment. It's no good buying children's quality paints and expecting anything other than a child's quality painting! You will need to experiment with different makes of paper to see which you like. I generally prefer Saunders Waterford 140lb NOT. NOT stands for Not Hot Pressed believe it or not! The paper comes in different weights and the surface is either rough, hot pressed or Not. Not is a nice middle of the road paper - Goldilocks would have liked it - not too rough and not too smooth but just right - well for my purposes anyway! As for brushes I have tried and tried so many different makes and still have to find the perfect brush. I have recently been using brushes from a company called Rosemary & Co and find the quality very good. I only use sable as I just can't get along with artificial blends - and I have tried because they are a lot cheaper. The artificial blends are just too floppy and lack the spring that sable has. Don't buy too many though as they are expensive - start off with just a couple. Having said that you should only use sable, you can get away with an acrylic blend with a larger brush which you will use to lay in backgrounds but only use sable for the delicate work.

In my next blog I will go into more detail about materials and also a trick to make sticking a wet bit of watercolour paper onto board easy (you need to do this to stretch it but I will explain all next time!)

Anne

Tuesday 3 June 2008

Arctic Fox in Summer


Still on the Arctic theme (it must be the British summer making me feel so cold!) here is the latest painting I've listed. I was fed up with always seeing paintings of Arctic Foxes in their winter coats and thought it would make a nice change to see one in his, still beautiful, summer coat standing in the flowers.

This is an acrylic painting, like the Timber Wolf, and was painted using a layering technique. This is I think pretty self-explanatory and the result is that by making the layers semi-transparent, the painting (hopefully) achieves a nice depth to it. I hope you like it!

Anne

Wednesday 28 May 2008

My wolf painting


Well, I was going to post the BSD (Belgian Shepherd Dog) next but I'm going to show a wolf instead! It's a painting I finished a while ago. What a goregous fellow! Surely this must be one of the most misunderstood and persecuted animals in the world. Big, bad wolf - NOT!


This is an acrylic painting and not my usual watercolour. One of the wonderful things about using acrylic paint is that if you make any mistakes, no problem- just paint over them! Not like watercolour where a mistake can be a disaster. Later on in the blog I will give a few hints and tips about watercolour painting which I have discovered over the years. As I am also going to give oil painting a try soon, I will let you share in my trials and tribulations with that medium!


The weather's taken a turn for the worse here so my dogs are curled up on the sofa snoozing, As usual - lucky them!

Anne


Friday 23 May 2008

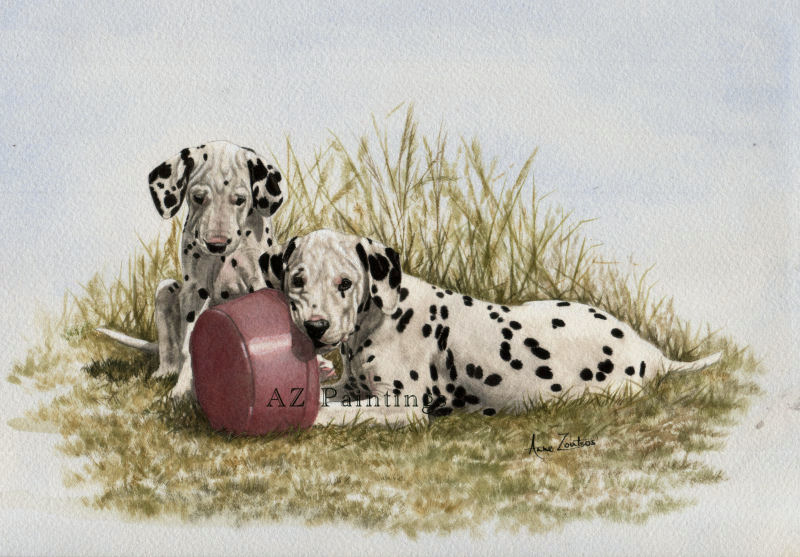
A Spot of Lunch - painting of Dalmatian puppies


What a hectic week! I've been busy with website and paperwork which never leaves enough time to paint!

I sent this painting off to a lovely lady in the USA this week. It's a painting I really like so I hope she likes it too! :) The donation from this painting went to Save the Dalmatians. I don't know how these fantastic rescuers manage to cope with some of the dreadful things they see but thank goodness they do!

I'm just putting the final touches to a Belgian Shepherd Dog - Terveuren variety - at the moment and will post that when it's finished. This one is a private commission - very necessary for a full-time artist!
It's reasonably nice weather here today so the dogs (my girls as I call them!) are able to sunbathe outside rather than being stuck indoors - lucky them!
Back to work now. More coming very soon.


Tuesday 20 May 2008

First Post

Welcome to my world - which mainly consists of painting and dogs - Dalmatians in particular.
I know very little about blogging at the moment so hope you will be patient with me while I learn! :)

More to follow shortly............